MySQL is a critical component for websites powered by PHP-based applications, including popular platforms like WordPress, Drupal, Joomla, and Magento, as well as widely used PHP frameworks such as Laravel, Symfony, and Zend. It serves as the backbone for storing and managing data, ensuring your website or application functions seamlessly.
In this tutorial, we’ll walk you through the process of creating a new MySQL database using the “MySQL Database Wizard” tool available in your cPanel hosting account. By following a few simple steps, you’ll be able to create a database, assign a user to it, and define the necessary privileges to ensure your application can communicate effectively with its database.
Getting Started
The first step you will need to take is to log in to your cPanel account.
Once you are logged into your cPanel account, please locate the “Database” section and click on the “MySQL Database Wizard” icon.
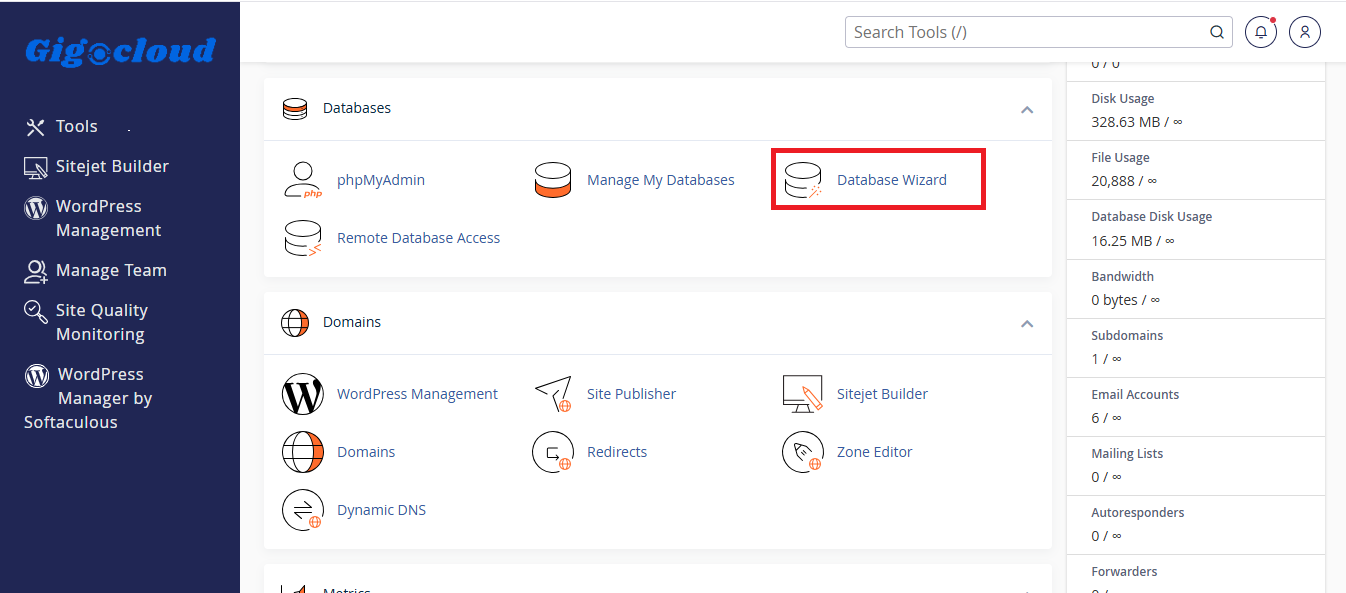
In the first step, you’ll need to define your database name by entering a unique suffix in the provided field. It’s important to note that all databases are automatically assigned a prefix based on the first eight characters of your cPanel username. This ensures that every database on the server has a unique identifier.
The final database name will follow this format: “prefix_suffix”. For example, if your cPanel username is “gigocloud” and you enter “newdb” as the suffix, the database name will be created as “gigocloud_newdb”.
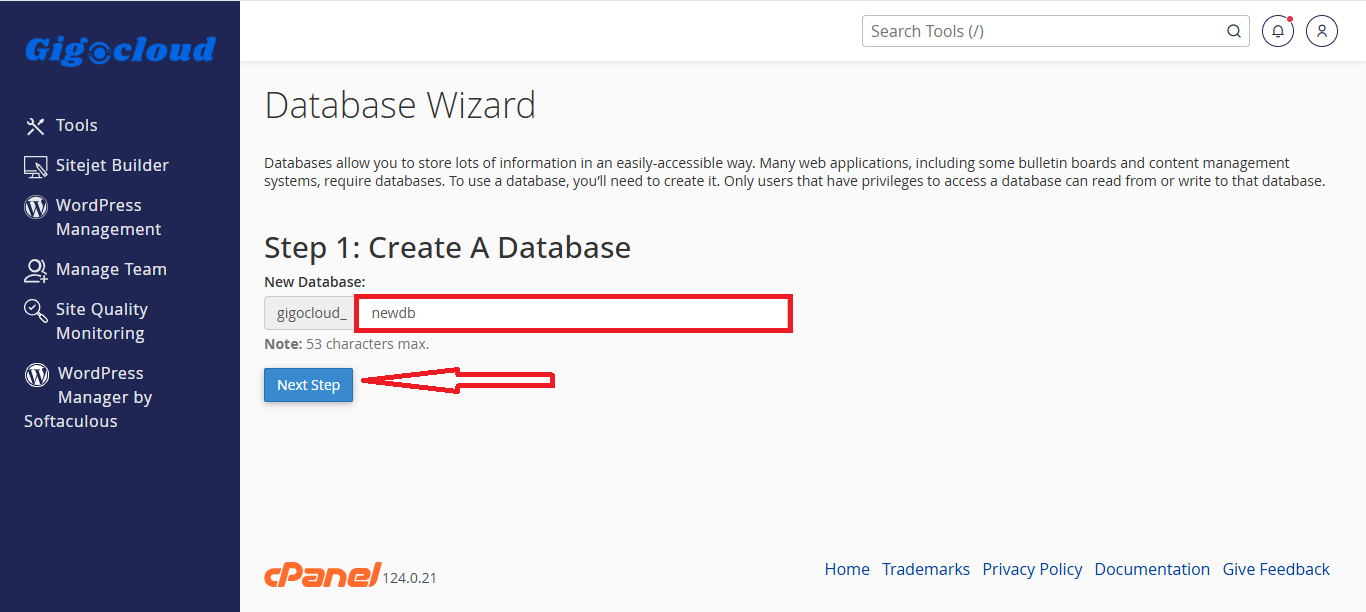
Once you’ve entered your database name, click the “Next Step” button to proceed.
Step 2: Create the Database User
In this step, you’ll create a Database User that will be assigned to the database and used to manage it. Fill in the required fields with a username and password for the database user.
For enhanced security, we recommend using the “Password Generator” tool to create a strong, secure password. This ensures your database is protected against unauthorized access.
Important Note: cPanel does not allow you to view the database password after it’s been set. You can only change it in the future. To avoid losing access, make sure to securely store the password in a safe location, such as a password manager or encrypted file.
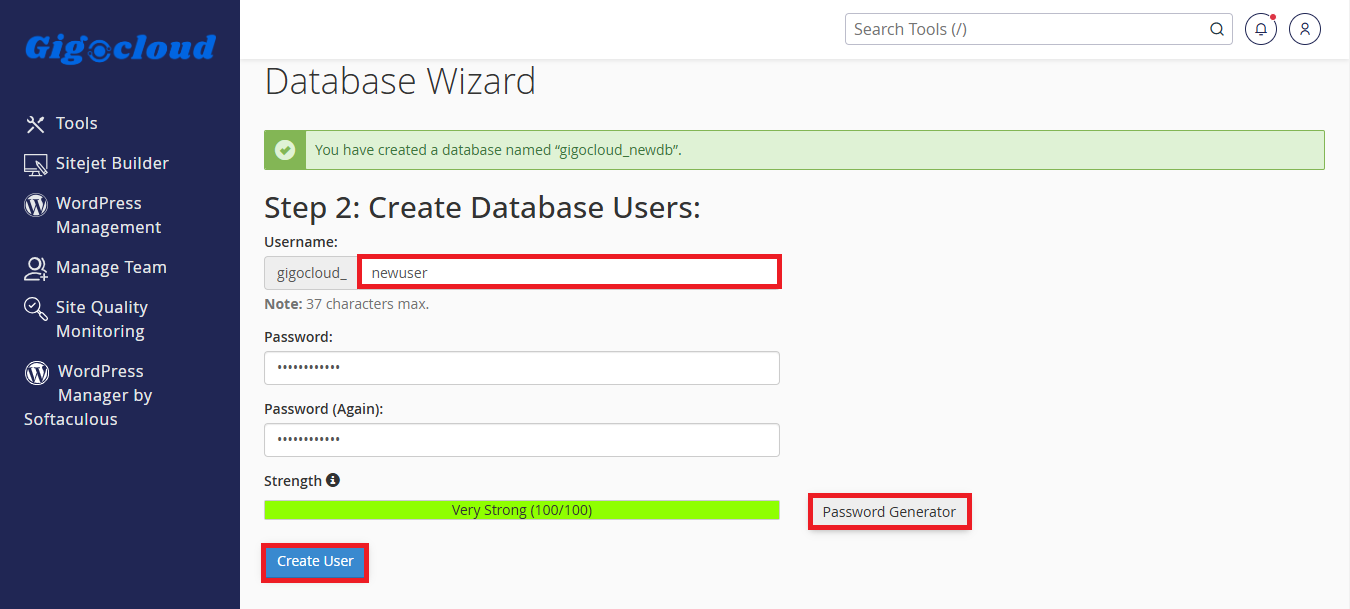
When you’re done, click the “Create User” button to proceed.
Step 3: Assign Database Privileges
In this step, you’ll define the privileges for the database user. These privileges determine the types of SQL queries the user can execute and the actions they can perform on the database.
You can enable specific privileges by checking the corresponding boxes. If you want to grant the user full access to the database, simply click the “ALL PRIVILEGES” checkbox.
Note: If you’re assigning this database to a website or application, it’s generally recommended to grant ALL PRIVILEGES to the user. This ensures the website can interact with the database without restrictions.
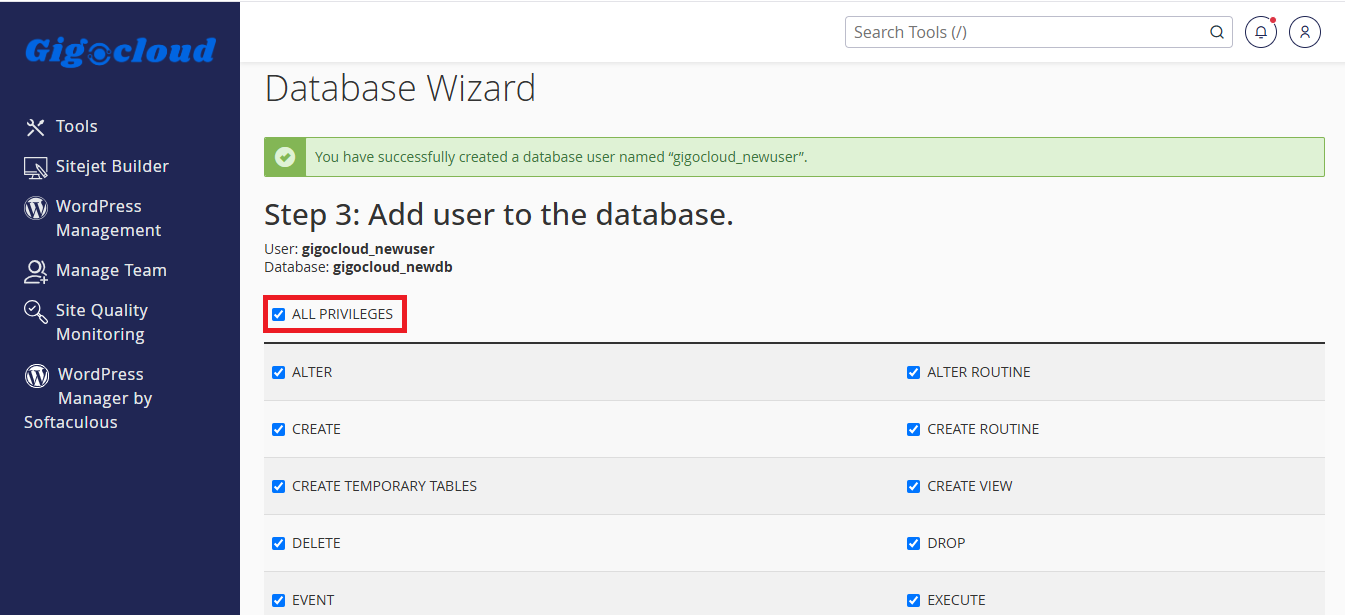
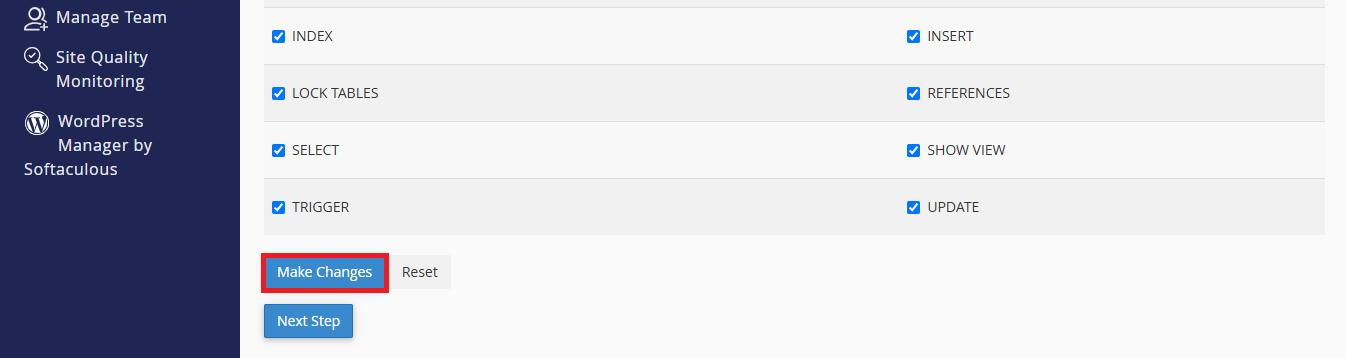
When you’re done, click the “Make Changes” button to finalize the database creation process.
Step 4: Task Completed
In the final step, you’ll see a confirmation message indicating that your database has been successfully created and the user has been assigned to it. This means your database is now ready to be used by your application or website.
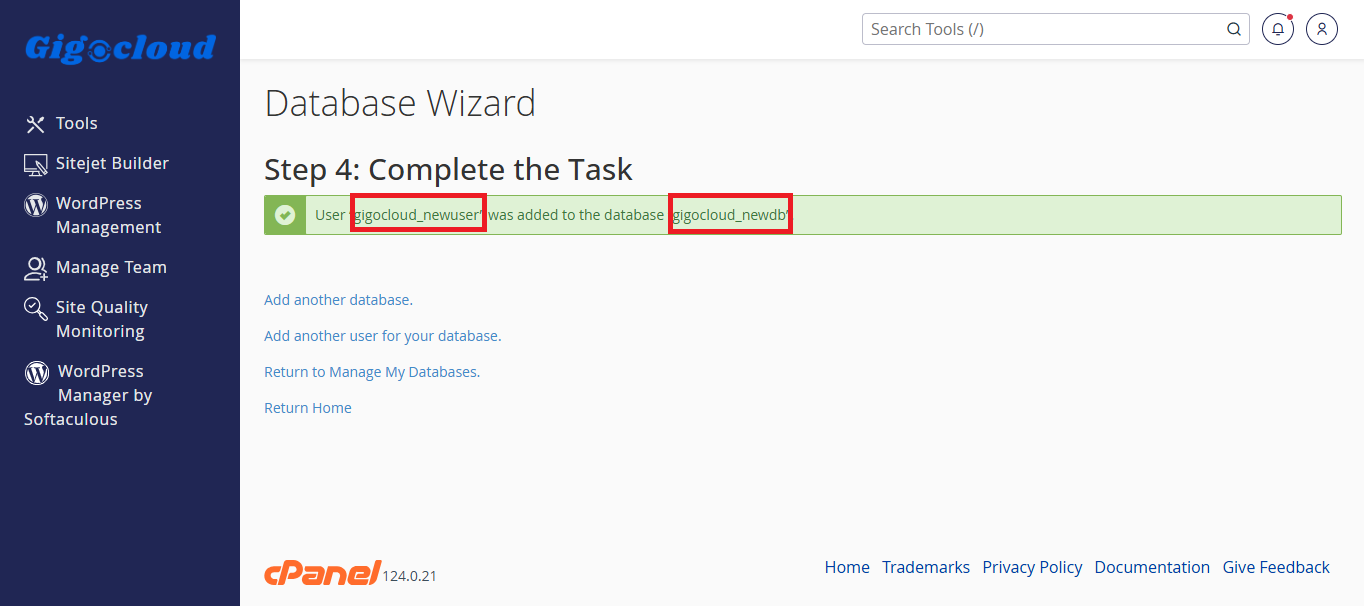
Below the confirmation message, you’ll find several useful links to help you continue your work:
-
Add Another Database: Click this link if you’d like to create another database and follow the same process outlined above.
-
Add Another User: Use this link to add an additional user to the same MySQL database.
-
Return to MySQL Databases: Click here to go back to the “MySQL Databases” section and view all your existing databases.
-
Return Home: Select this link to return to the cPanel home page.
Congratulations!
You’ve successfully created your new MySQL database. You can now assign it to your project and begin development.
We hope you found this tutorial helpful and easy to follow. If you have any additional questions or need further assistance, please don’t hesitate to reach out to our Support Team. We’re here to help!